Infrastructure as Code
Infrastructure as code is a method of defining your infrastructure using plain text code which can be checked into a version control system and which an automation tool can read and then provision automatically. The benefit of this system is that infrastructure design is defined in a way that’s easy to understand and rebuild/reproduce automatically, quickly, and upon demand. In this post, we’ll go through setting up a composable infrastructure that I use to manage the services I create.
The benefit of infrastructure as code is that it allows you to make low-risk changes quickly without necessarily making a large impact. You’ll always be able to quickly and easily roll back changes if required. It also enables auditing of changes by setting up your CICD pipeline to deploy from version control.
Hardware Pre-requisites
You can make this as simple as you like and stick with a single node. The CPU architecture also doesn’t matter. x86, ARM, 64 bit, 32 bit - it doesn’t matter, as long as the system applications you intend to run are available for it.
I settled for four Raspberry Pi nodes as it would enable a fault-tolerant system. Unfortunately, I didn’t follow through with this in the networking and settled on a single 5 port gigabit switch with a single uplink. This could be improved upon, maybe even a wireless backup link from each node, for example, providing node-level network redundancy. I grabbed some balsa wood and a few standoffs and built a simple setup that works nicely - but again, a single server works fine for this demonstration as well.

Software Pre-requisites
You’ll need an internet connection that’s capable of accessing https://hub.docker.com/.
You must first have Docker and Docker Compose installed, and you should verify you can run the two commands below:
docker version
docker-compose version
If these commands succeed, you’re good to go. If you don’t have one of them installed, check out Get Docker CE for Ubuntu. There are links on the left menu for alternative steps for other distributions. There’s also a document for Installing Docker Compose.
Docker
Why use docker? Well, you don’t have to - I just do. All you need is a unit of deployment, whether it be a VM or bare-metal, a container, etc… the principal is the same, however, this guide assumes you use Docker. By putting my services into a docker container, it gives you a clear unit of deployment, and you can then describe how you want to deploy that specific unit using a deployment system such as Docker Compose.
When thinking about Infrastructure as Code, it is important to think in general terms. Docker can be substituted for a tar file for all we care - but when thinking about using Docker it should be thought of as our deployment unit. We deploy images into containers instances which then run to carry out their task.
Docker Compose - Defining your first service
Docker Compose is a tool where you can describe your deployment as a text file, formatted as YAML. An example is below, which is all you need to provision a MariaDB instance.
version: '3.8'

services:

    my-db:
        image: mariadb:10
        volumes:
            - /data/my-db:/var/lib/mysql
        environment:
            - MYSQL_RANDOM_ROOT_PASSWORD=yes
            - MYSQL_DATABASE=gitea
            - MYSQL_USER=gitea
            - TZ=America/Edmonton
Let’s break this down a little bit. The first line “version: ‘3.8’” is just a reference to the version of the docker-compose spec. Newer versions are released all the time with new features, but you can guarantee your docker-compose.yaml file to work in the future releases by specifying the version of the spec you are using for your file. At the time of this post, 3.8 is the latest version.
Next, under the services key, we can define our services. Each service can be assigned a unique name, in this case, I chose my-db. This name is important because other services can reference this name as if it were a DNS name in order to connect to the service. You’ll see what I mean later on when we provision a second service.
Below the name, we specify the image, or name of the container we wish to run, in my case, it’s MariaDB version 10 (latest release).
After that, a volume is defined - this is how storage is mapped between your host system and the container. By default MariaDB stores data in /var/lib/mysql, but this is inside of the container. If the container is removed or even reprovisioned, all data will be lost - so we must map the directories we wish to keep to our host filesystem. In this case, all data will be stored in /var/lib/mysql inside of the container, but because this mapped to the host using a volume, it will actually be stored with persistence at /data/my-db on the host.
Finally, we define some environment variables - MariaDB will read these variables upon startup. The environment variables are scoped to that specific service and won’t impact any other services which are provisioned.
That’s all you need to provision a MariaDB database. Save that to a file named docker-compose.yml and if you run
docker-compose up
You will then have a running database!
Going back to why we only map /var/lib/mysql and not just run the whole container from the host filesystem. It’s important to shift thinking a bit from traditional infrastructure and data management. To have an antifragile data, you must separate what data you need to persist and what can be thrown away. In order to preserve stability, it’s important to throw stuff away, reset clean, etc. We should be able to crash the container, upgrade it, downgrade it, blow it away at random and have it restart from image and maintain a still maintain a relatively stable system. I say relative, because the odd transient error would and should be expected. It would be expected because of the startup time when the container restarts. It should be expected because then it will force the correct design of upstream services such as the front end to handle transient errors gracefully. I wrote about these types of ideas in my post covering the Fallacies of Distributed Systems. If you’re really interested though, Nassim Taleb has written a book called Antifragile which speaks about some of the finer points of this very general subject which can be applied to all sorts of abstract problems.
Docker Compose - Defining your second service
Great, we have a database but nothing can connect to it, it’s not doing anything except running in an isolated network. Let’s add an adminer instance (adminer is like PHPMyAdmin, but more lightweight) so we can browse the database with a web interface.
We’ll start with our original file and add to it.
version: '3.8'

services:

    my-db:
        image: mariadb:10
        volumes:
            - /data/my-db:/var/lib/mysql
        environment:
            - MYSQL_RANDOM_ROOT_PASSWORD=yes
            - MYSQL_DATABASE=gitea
            - MYSQL_USER=gitea
            - TZ=America/Edmonton

    my-adminer:
        image: adminer:latest
        ports:
            - 8080:8080
Notice how we can simply add a new service below, with a new name and completely separate set of properties. In this example, we specify the image name for adminer but instead of specifying a version, we just say “latest”. This will automatically update the image with the newest version the next time we run the docker-compose pull command.
For adminer, we don’t need persistent storage for the service, but we do need to map the container port to our host so we can browse to it from our computer. The same could be done for port 3306 for the MariaDB service if you need external access to the MariaDB service.
docker-compose up
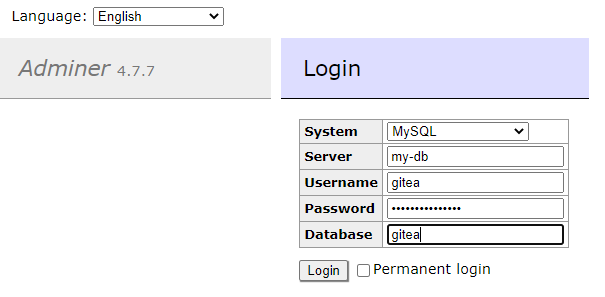
You can now browse to http://myserver:8080. As I mentioned above, the name of the service can be used as if it were DNS to allow one service to reference another service - so to connect from adminer to my-db it would look something like this:
Docker Compose - More than one web service
In the example above, we bind adminer to port 8080, but what if we need 8080 for something else? Well, we can map it to a different port on the host, sure - but keeping track of that gets out of hand quickly and doesn’t scale out well.
The solution is to throw a reverse proxy on top of this bad boy to act as an ingress point for our services, then we can remove the ports and 8080 reference from the my-adminer service.
I recommend checking out my post on using traefik as a reverse proxy
This site
My blog site uses Hugo to generate static content, so it’s fully in line with the Jamstack methodology. The source content for Hugo is stored in version control in a private repository on https://deadbeef.codes (also defined w/ IaC). When new content is pushed to master branch, a drone CICD (also defined w/ IaC) job kicks off to build the Hugo site:
.drone.yml - defines what the CICD job does when code is pushed to the master branch in source control.
kind: pipeline
name: default

workspace:
  base: /go
  path: src/deadbeef.codes/steven/stevenpolley.net-hugo

steps:

- name: clone deps
  image: docker:git
  pull: always
  commands:
    - git clone https://deadbeef.codes/steven/deadbeef.codes-publicfileserver

- name: build hugo site
  image: jojomi/hugo:latest
  pull: always
  commands:
    - hugo

- name: build fileserver
  image: golang
  pull: always
  environment:
    GOOS: linux
    GOARCH: amd64
    CGO_ENABLED: 0
  commands:
  - cd deadbeef.codes-publicfileserver
  - go get
  - go build -a -ldflags '-w'
  - mv deadbeef.codes-publicfileserver ../fileserver
  - cd ..

- name: package in docker container
  image: plugins/docker
  settings:
    repo: registry.deadbeef.codes/stevenpolley-net
This will package the built hugo site (static HTML files, images, CSS, javascript) along with a webserver I made in Go which just serves static files into a new docker container named registry.deadbeef.codes/stevenpolley-net.
Now that we have all the building blocks, finally - the docker-compose.yml file defines the actual deployment.
version: '3.8'

services:

  traefik:
    image: traefik:2.2.6
    restart: always
    ports:
      - 80:80
      - 443:443
    volumes:
      - /var/run/docker.sock:/var/run/docker.sock
      - ./traefik.toml:/traefik.toml
      - ./acme.json:/acme.json
      - /data/log:/log
      - ./dynamic_conf.toml:/dynamic_conf.toml
    command:
        - "--providers.docker=true"
        - "--providers.docker.exposedbydefault=false"


  stevenpolley-net:
    image: registry.deadbeef.codes/stevenpolley-net:latest
    restart: always
    depends_on:
      - traefik
    expose:
      - "8080"
    labels:
      - "traefik.enable=true"
      - "traefik.http.routers.stevenpolley-net-web.rule=Host(`stevenpolley.net`)"
      - "traefik.http.routers.stevenpolley-net-web.entrypoints=web"
      - "traefik.http.routers.stevenpolley-net-web.middlewares=redirect@file"
      - "traefik.http.routers.stevenpolley-net-web-secured.rule=Host(`stevenpolley.net`)"
      - "traefik.http.routers.stevenpolley-net-web-secured.entrypoints=web-secure"
      - "traefik.http.routers.stevenpolley-net-web-secured.tls=true"
      - "traefik.http.routers.stevenpolley-net-web-secured.tls.certresolver=le"

# ...remaining contents of docker-compose redacted for privacy
Traefik is the reverse proxy, and the labels for the stevenpolley-net service - traefik searches for these labels to understand how it should configure itself to present the service publicly. In my case - it uses “le” as the certresolver which I’ve set up for let’s encrypt.
Closing Thoughts
As you can see there is a lot more work for the initial setup, it also seems much more complex - but I would argue that as it’s just a different way to work and once you get the hang of this or any other system to manage Infrastructure as Code, it’s probably much more efficient. Not to mention upgrades are a breeze. To upgrade traefik in the above YAML, simply change 2.2.6 to 2.2.7, commit it, and push to master - boom. The upgrade is done. Rollback? Simply revert to the previous commit, push to master. Boom - you’re rolled back. Additionally, this has the added benefit of codifying your deployment so others can read it and understand exactly what you’ve done to deploy the service. The old manual way of doing things - who knows what the sysadmin has done to deploy or upgrade the service.
This now leads to auditability and change control processes. With IaC, you can control changes by gatekeeping what code is pushed to master. Gone are the days of writing implementation plans and backout plans. The commit comment is your description. The pull request comment is your justification and risk/impact analysis. The implementation plan is the diff of the commit and acceptance of the pull request into the master branch is the actual implementation. The backout plan is literally to revert the commit (assuming outside data has not been transformed) and that’s it. The value of working in this way cannot be understated. Especially when troubleshooting an issue as ops. There is an exact log of everything done to the system right in version control.
Next, I plan on writing how this type of infrastructure can be scaled out with Kubernetes as a replacement for docker-compose.